SHAREfactory Wiki
Advertisement
200 SfLogo

Below you'll find helpful tips and how-to's on common issues you may encounter.

Below are a number of tips and helpful tricks you can use to perform advanced edits in SHAREfactory to get the most out of your projects.


Evaluating Themes Before Starting a Large Project[]


ChooseTheme2

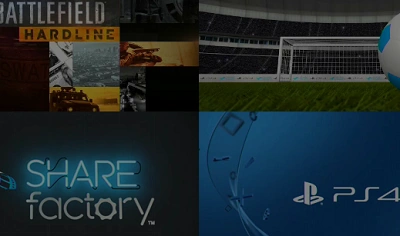
Each Theme has content specific to that Theme, so choose wisely.

While you can choose any Theme to build your project in, you should keep in mind that once you select a Theme for your project, you cannot change the Project's Theme. This means that your project will only have access to the selected Theme's assets. This can include Stickers, Text Fonts, Cinematic Transitions, Theme Backgrounds in Screenshots, and Theme Music. Refer to Theme Assets for full details on these affected assets when making this selection.


Using USB Music Import To It's Fullest![]


USBImportFAQ

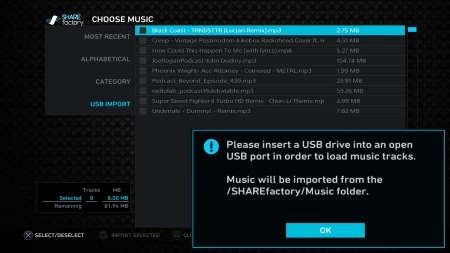
Use USB Music Import for Sound Effects, Dialogue, or audio from another video clip.

USB Music Import is not limited exclusively​ to music MP3s. Users can also take advantage of any Sound Effects, Audiobooks, Podcasts or MP4 Videos and import them as audio tracks. Anything that can be understood as an audio format by SHAREfactory can be added as a Music Track, so long as the audio file adheres to the limits defined by the Music Import guidelines (manual Pg 69):

EXAMPLES:

  • Import a MP4 Video Clip as Music to allow dialogue from the clip to overlay other clips.
     
  • Import Sound FX to add comedic value
     
  • ​Import Audiobooks to dictate a story


NOTE: Imported Music Tracks are limited to the 500MB budget.
If a Video MP4 is imported as Music, the full video size will use the 500MB limit. In these cases, it may be more advantageous to re-encode these videos as MP3 audio tracks using software such as Audacity or Goldwave.

NOTE: Music timeline is limited to 12 Music Tracks/Splits.

Supported Music Import file formats:
MP3, MP4, M4A, OGG, AAC, 3GP2, 3GP, AMR​


Snip vs. Split[]


Splitmarker

L2 Snip is a deceptively powerful tool for timed edits.

When in Split Clip Edit Mode, you gain a few extra options:

X Split

  • Split will splice a clip into 2 separate clips before and after the highlighted frame.


SQUARE Delete

  • Delete removes the highlighted clip from the project. This can also be done from the main timeline, however this combines the delete action into a single button rather than opening multiple menus.


L2 Snip

  • Snip is a powerful option that combines both Split and Delete into a single action. Depending on which half of the highlighting clip the playhead is place, Snip with remove the remaining amount of the clip from the frame the playhead displays on to the beginning or end of the clip (this is signified by an "X" displayed on the left or right of the playhead). This can be extremely useful when attempting to time videos accordingly with audio or music queues.


LIMITATIONS:
​Split and Snip Clip​ cannot be performed within areas of a clip that are affected by a Transition.

As of Patch 1.05, Snip Clip no longer functions when a Transition is present in the direction of the Snip function. This is to prevent unseen frames affected by Transitions from also being deleted and causing unintended errors.


Circumventing The 50-Clip Project Limit[]


50clips 80mins

Due to memory constraints, you can only use 50 clips/splits at once. However, Exports count as one clip.

Some Users may find that 50 Clips is not enough to fully complete their project. To circumvent this, Users can export their current projects to the Capture Gallery, then add the exported video clip into a new Project as a single Video Clip.

There are some things to keep in mind before attempting this method:

  • Remove as much of the Project's audio as possible to prevent any unintended audio-balancing issues when re-importing the Project.

     
  • If you wish to switch the Project's Theme, be sure to apply any FX or other Theme-specific Assets to the Project before Exporting.

     
  • Editors may wish to apply Transitions before Exporting to Gallery, as it may prove more difficult to Split the larger clip at the intended times.​


Controlling Sticker & Text Overlay Duration with Split Clip​[]


How_to_control_Sticker_Text_durations_in_SHAREfactory_(PS4)

How to control Sticker Text durations in SHAREfactory (PS4)

Sticker and Text Overlays display from the point at which they were placed in the clip until the end of the clip. In order to stop an Overlay from displaying, use the Split Clip function.

  1. Move the playhead to the point in which you want the Overlay to stop displaying
  2. Select SQUARE Edit > Split Clip.
  3. Select X Split


Your Video Clip will play seamlessly over the split and all FX will be removed from the next Video Clip segment.


Fading Sticker & Text ​Overlays with Crossfade Transitions​[]


How_to_Fade_Sticker_&_Text_Overlays_with_Crossfade_Transitions_-_SHAREfactory_(PS4)

How to Fade Sticker & Text Overlays with Crossfade Transitions - SHAREfactory (PS4)

As shown above with showing how to stop Overlays from displaying, you can use this method to also add fading and other effects to Overlays by using Transitions.

To fade-out an Overlay:

  1. Split Clip with an Overlay as shown above.
  2. Add a Crossfade Transition to the end of the first clip

    This results in the Overlay fading out while the 2 clip blend over each other.


To fade-in an Overlay:

  1. Split Clip where you want the Overlay to start displaying
  2. Move the Playhead to the first frame following the Split
  3. Apply your Overlay to this frame
  4. Apply a Crossfade Transition to the end of the first clip.

    This results in the Overlay fading in, while the 2 video clips overlap.


NOTE: This method is not just limited to Crossfades. Try these method with any of the Wipe Transitions for a wide variety of effects. (Directional Wipes, Block Fades, etc.)


Creating Freeze-Frame Effects​ with Screenshots[]


How_to_add_freeze-frame_effects_to_SHAREfactory™_videos

How to add freeze-frame effects to SHAREfactory™ videos

Utilizing the Screenshot functions of the SHARE2 button, you can create freeze-frame effects in you videos.

  1. Move the playhead to the frame you wish to freeze on.
  2. Split Clip at this point. Use PS4 L1 Button / PS4 R1 Button to ensure you are on the first frame on this split.
  3. Select PS4 L2 Button Fullscreen
  4. Allow the UI to hide, then save a Screenshot with SHARE2. This will save to your Capture Gallery.
  5. Add your screenshot to this split. You can now use Trim Clip or Split Clip to expand of contract this screenshot from 1 second to 15 minutes.


NOTE: You can also save clean images of video frames within the Capture Gallery Trim by selecting Save As Screenshot.


Advanced Fade-to-Color Effects Utilizing SOLID COLOR Screenshots[]


Custom Fade-to-Color

Create your own custom Fade-to-Color Transitions with SOLID COLOR Screenshots.

When combined with Crossfade Transitions, SOLID COLOR Screenshots prove to be very useful for extended edits, simulating Fade-to-White effects, extending the duration of Fade-To and Fade-From Color Transitions and more.

  1. Highlight the SOLID COLOR Screenshot in the Track 1 Timeline.
  2. Open the Edit Menu. You'll notice that Clip Volume has now become Settings. Use this option to open the Color Picker and change the Screenshot to any desired color.
  3. Add a Crossfade Transition to fade into this color. You can also use Trim Clip to extend or shorten the duration the Color Screenshot displays for.


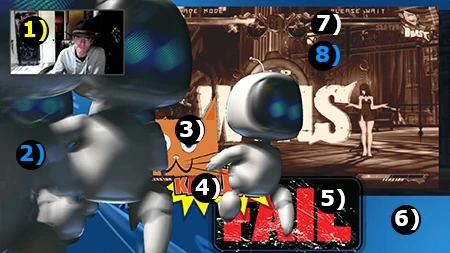
Adding Custom Stickers with Avatars & Profile Pictures​[]


How_to_Add_Custom_Images_into_SHAREfactory™_Projects_(PS4)-0

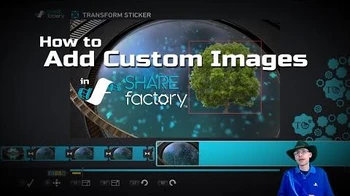
How to Add Custom Images into SHAREfactory™ Projects (PS4)-0

  • (*WIP*), Re-work for Import Images (Stickers).


Layering FX[]


FXlayering1

Different FX display on top of others. See a list of examples above

As mentioned in FX Behaviors & Functionalities > Layering FX, different FX Assets will appear over others. Some FX Assets, such as Stickers & Text Overlays, have a Layer Order control that allow you to define the display order of FX, other FX and features appear in different priorities. These priorities display as follows from top-to-bottom:

  1. Track 2 PIP Video Commentary
  2. Transitions
  3. 3rd Sticker/Text Overlay placed
  4. 2nd Sticker/Text Overlay placed
  5. 1st Sticker/Text Overlay placed
  6. Layout
  7. Filter
  8. Video Clip


​​NOTE: v1.07 adds Layer Order control for Overlay FX. This allows Users to re-order Sticker and Text FX up or down in the display order. Other features retain the previous priorities.

You can also now enter Layer Order Mode actively in v2.00 Edit Overlays. [LEFT ANALOG STICK] can automatically highlight and enter this mode, allowing more freedom to change Overlay display orders.​


Using Share Play & USB Video Import for Multi-User Projects[]


SharePlay

Share Play SHAREfactory Projects to allow friends to edit your projects, or show off your videos privately.

Players can use the Share Play feature to relinquish control of their system and allow friends to edit their Projects over an internet connection. This can allow for multiple editors with different specialties to work on a single over a large distance.

More of Share Play and it's functionalities can be found below in +2.00 PS4 System Software Updates & Changes > Share Play.

Another feature for these projects includes using USB Video Import to add videos from another user's console to add their view into your own projects. This is great for when you want to show off a team's PVP match from multiple angles.


Create on a Private Account, Publish on a Public One![]


User-tagging

Working with the tagging system, you can create on a private account and publish on a public one.

As mentioned in [[SHARE Button Functionality & Tips > User Tagging in Capture Gallery]], all active Users are "tagged" with video ownership when a Video Clip is created.

This means than Users can create a project with gameplay footage from their private account, then activate another DUALSHOCK®4 or device that logs into the public account. This allows Popular Users to maintain their privacy when desired, while still being able to share their favorite moments from private gameplay.

To use this method of publishing:

  1. Add 2 PSN Account to the same console, one personal account with lots of footage, and a second with the desired publishing account for YouTube/Facebook/etc.
     
  2. Create the Desired Project on the Private Account in SHAREfactory™ using the User's best footage.
     
  3. Activate the 2nd DUALSHOCK®4 and Log Into the Public Account.
     
  4. Select "Export to Gallery" in SHAREfactory™. Even though SHAREfactory™ is a 1-player app, the console will give editing privilages to all active Users.​
     
  5. Enter the Capture Gallery on the Public Account, and you'll note that you can now publish the Exported Video on your public account using your best footage without compromising your private account's name!


​NOTE: Be sure to delete your private PSN ID from the Title Clip!


​​​Posting Links to Facebook/Twitter When Sharing[]


Postlink1

You can automatically post a cross-promotional link to Facebook & Twitter when uploading.

When you are sharing a video to YouTube or dailymotion, or are starting a stream for YouTube or Twitch, you can automatically post a link to the video on Facebook or Twitter. This also opens a field allowing you to customize the post that will be published to these platforms. (Text limits apply.)​


Combining Multiple Videos into One.[]


200 SfLogo

Below you'll find helpful tips and how-to's on common issues you may encounter.

Using SHAREfactory's Export, you can add multiple video clips into your projects, edit out the parts you don't need, then Export them into a single clip in the Capture Gallery. This creates a new video clip from the previous ones, allowing you to delete the originals to free up disk space.

From any Video Project's main timeline:

  1. Select Add Clip. This adds Capture Gallery videos to your timeline.
     
  2. Use any of SHAREfactory's available features to edit your videos, including Trim, Split, and Delete.
     
  3. Select TRIANGLE Share to Export your video automatically to the Capture Gallery.


Creating Time-lapsed Progressions with Time Bender[]


Timelapse

Using Time Bender, you can fast-forward through long playthroughs without hard cuts.

Sometimes you don't want to show off a lot of uninteresting walking. Using Time Bender, you can fast forward through sections of your playthrough to show your uninterrupted progression and get to your more interesting parts.

To produce this effect:

  1. Split your clips at the points you want the effect to begin and end.
     
  2. Apply the Time Bender speed and effects of your choice to the center clip.


You can also accentuate the Time Bender effect by adding a "FF>>" sticker or the VHS Filter to your Time Bender clip.


Adding Multiplayer Views with USB Video Import[]


200 SfLogo

Below you'll find helpful tips and how-to's on common issues you may encounter.

When you want to show off a video of you and your friends matches, but don't just want to show off only your own point-of-view in the match, you can use USB Video Import to copy your friends videos from their PS4s and add them to yours for editing.

You can also take advantage of Track 2's Add Clip and Side-by-Side PIP Layouts to show the same action from multiple views.

Additionally, when recording your videos, you can embed Party Chat audio into SHARE videos with Share Party Audio. (See 3.50 PS4 System Software Updates & Changes)


Advertisement